Step By Step - How To Upgrade ADFS 2.0 To ADFS 4.0
 Sitender Kumar
Step By Step - How To Upgrade ADFS 2.0 to ADFS 4.0
-
Scenario
-
Prerequisites
-
Take a note of your ADFS 2.0 Server Properties.
-
Export the Service Communication Certificate.
-
Export ADFS Configuration to Files.
-
Import the Service Communication Certificate.
-
Install ADFS 4.0 on New Windows Server 2016 ADFSFed01-Temp Server.
-
Import ADFS Configuration Files.
-
Verification of ADFS 4.0 functionality.
-
Import the Service Communication Certificate on Proxy Server.
-
Install and configure Web Application Proxy on ADFSProxy01-Temp.
-
Rename ADFS 4.0 Servers with old ADFS 2.0 Servers IP.
If you are using ADFS 2.0 on Windows 2008 Server and you want upgrade ADFS 4.0 to leverage the advantages of ADFS 4.0 then this article will help you. As in place upgrade is not supported to upgrade from ADFS 2.0 to ADFS 4.0. you need to perform side by side upgrade and replace with original server.
Scenario:
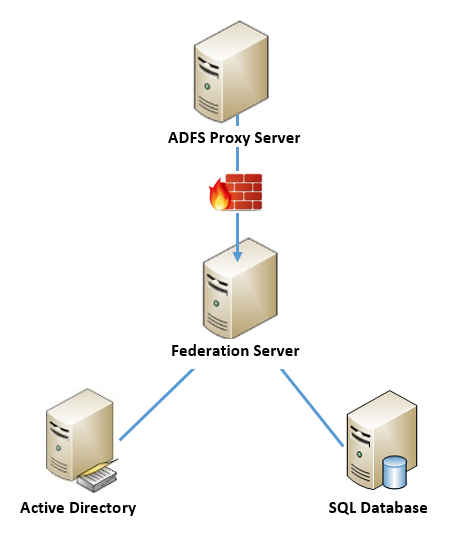
Consider, we have 1 Federation Server, 1 Proxy Server and 1 SQL Database Server. Your goal is to perform upgrade ADFS from 2.0 to 4.0, using same name and IP address. It will save your efforts to make changes at network level like opening ports, traffic routing etc.
|
Server |
Host Name |
IP Address |
|
ADFS Proxy Server |
ADFSProxy01 |
10.10.5.5 |
|
Federation Server |
ADFSFed01 |
10.10.10.11 |
|
Active Directory |
AD01 |
10.10.10.12 |
|
SQL Database |
SQLDB01 |
10.10.10.13 |
Federation Service Name : sts.eXperts-Adda.com
Admin Account Name : EXPERTS-ADDA\adfs_Admin
Service Account Name : EXPERTS-ADDA\adfs_svc
New Database Name : ADFSINSTANCEV4
Prerequisites:
- ADFS 4.0 requires Domain controllers running Windows Server 2008 or later
- At least one Windows Server 2016 domain controller is required for Microsoft Passport to Work.
- A Windows Server 2008 domain functional level or higher, is required for client certificate authentication, If the certificate is explicitly mapped to a user's account in ADDS(Active Directory Domain Services).
- New installations of ADFS 2016 require the Active Directory 2016 schema (minimum version 85), ONLY if you indent to use all New Features of ADFS 4.0.
- Keep Windows Server 2016 Installation Media to Run Export/Import command on ADFS 2.0.
- Note Down the Account name and password for service account by which ADFS Service is running.
- Domain Admin Account.
- Export the Service Communications Certificate with its private key and keep it to safe location.
- Build 2 Servers with Windows 2016 Server with Temporary IP and name.
|
Server |
Host Name |
IP Address |
|
New ADFS Proxy Server |
ADFSProxy01-Temp |
10.10.5.6 |
|
New Federation Server |
ADFSFed01-Temp |
10.10.10.21 |
Note: IIS is no longer required for ADFS proxy Server. It uses Windows Server Web Application Proxy server. Windows Web Application Proxy is a component of the Remote Access Windows Server role.
Let’s Start:
Take a note of your ADFS 2.0 Server Properties:
1. Login into ADFSFed01 ADFS Server.
2. Click on Start --> Administrative Tools --> ADFS 2.0 Management.
3. Right Click on root “ADFS” and Select “Edit Federation Server Properties…”.
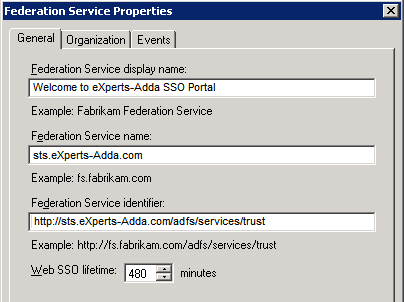
- Note Down Federation Service Display Name
- Note Down Federation Service Name
- Note Down Federation Service Identifier
Export the Service Communication Certificate:
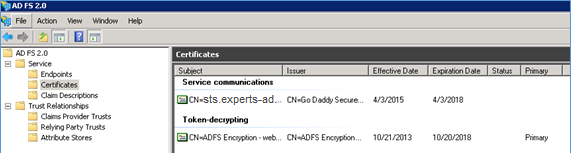
1. Under ADFS 2.0 Management Console, Click on Certificates.
2. Select Service Communications Certificate and Right Click and select View Certificate...
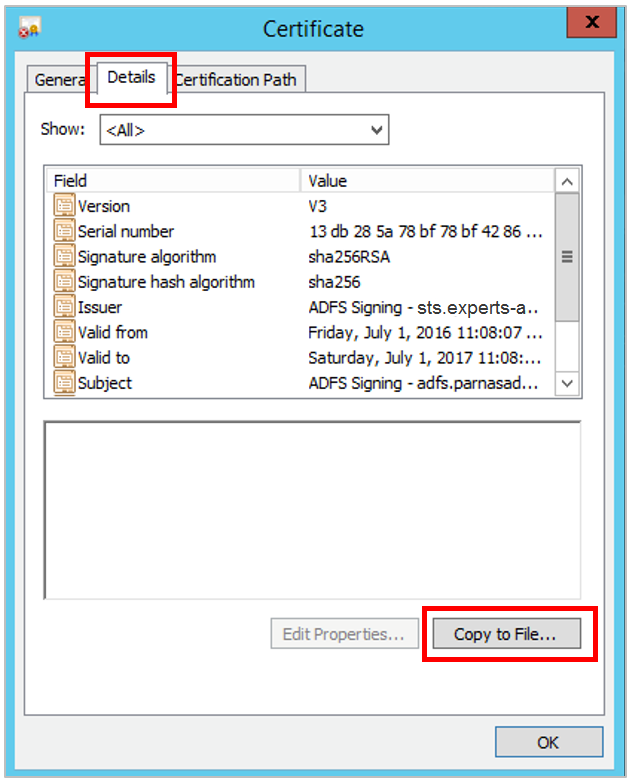
3. On the Certificate, click on Details Tab and Click on Copy to File… button.
4. In the Certificate Export Wizard click Next.
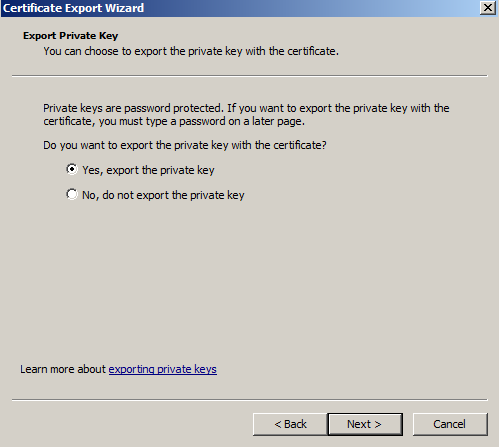
5. Choose "Yes, export the private key" and click Next.
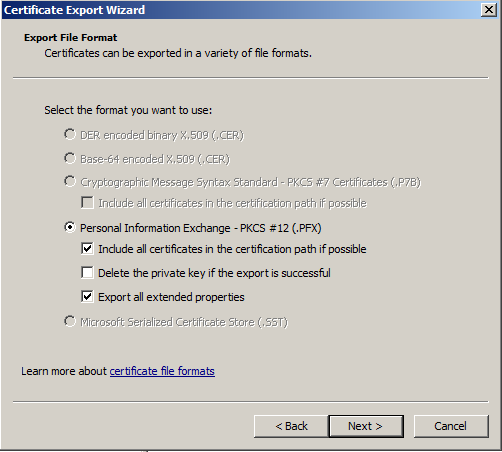
6. Click the checkbox next to "Include all certificates in the certification path if possible" and “Export all Extended Properties” and then click Next.
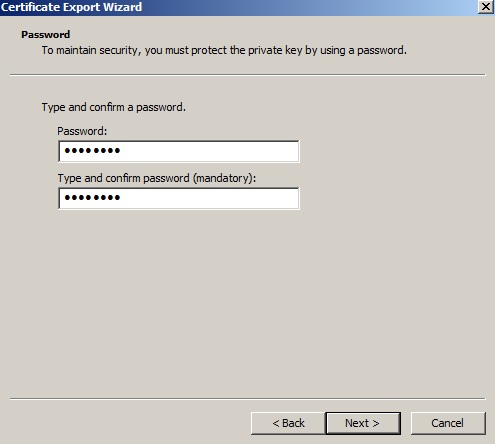
7. Enter and confirm a password and Click Next. This password will be needed whenever the certificate is imported to another server.
8. Click Browse and find a location to save the .pfx file to. Type in a name such as "experts-adda" and then click Save.
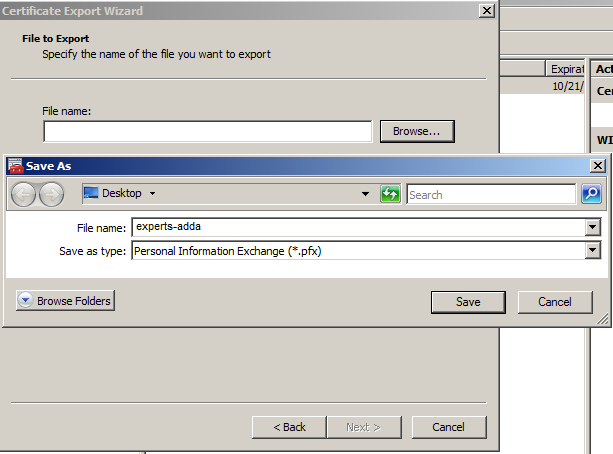
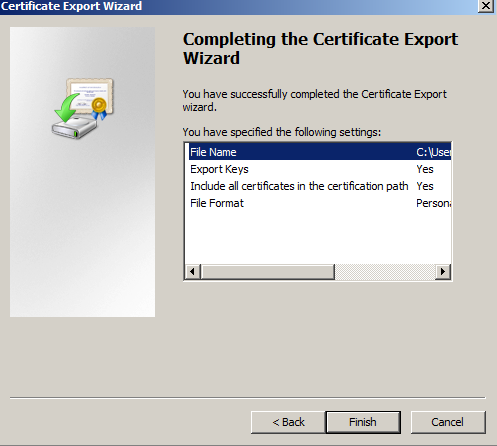
9. Review details and Click on Finish. The .pfx file containing the certificates and the private key is now saved to the location you specified.
Export ADFS Configuration to Files:
1. Mount the Windows Sever 2016 install media and open a Power Shell with “Run as Administrator” privilege.
2. Navigate to the \support\adfs\
3. Create a folder to export your adfs configuration to with MD c:\adfs_backup,
4. Run below Command to export a copy of your ADFS 2.0 configuration.
.\export-federationconfiguration.ps1 -path c:\adfs_backup
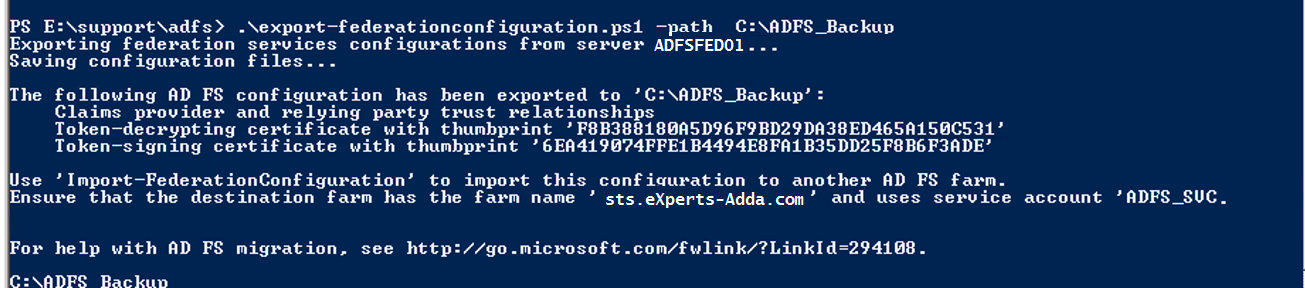
5. Dismount the Windows 2016 install media.
6. Copy the c:\adfs_backup folder and certificate you exported above to New Windows 2016 ADFSFed01-Temp Server’s c:\adfs_backup folder
Note Below steps will be performed on New Windows 2016 ADFSFed01-Temp Server
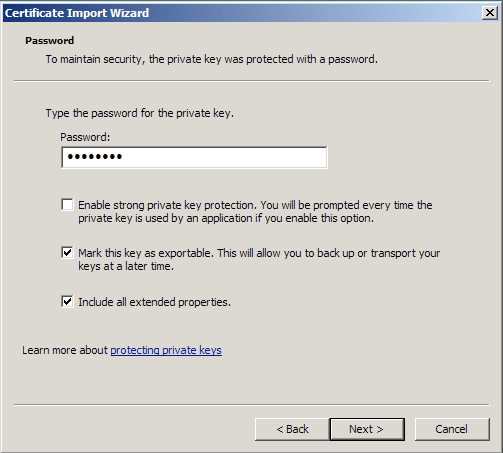
Import the service communication certificate:
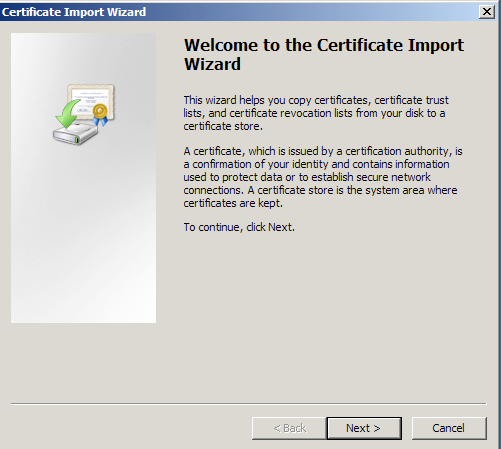
1. Right Click on certificate that you copied from Old ADFS servers.
2. Click on “Install PFX”.
3. It will open Certificate Import Wizard, click Next.
4. Review the certificate path and then click Next.
5. Enter the password that you set when you exported the .pfx file and Select "Mark this key as exportable".
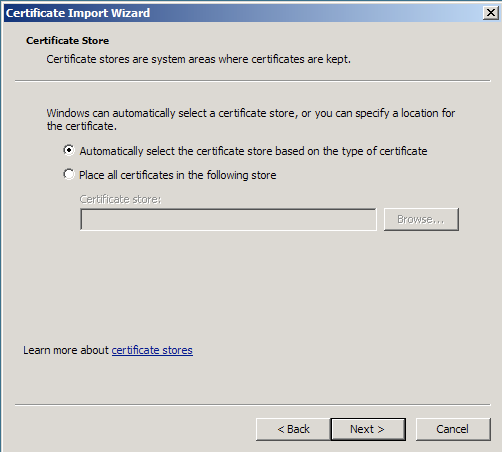
6. Select "Include all extended Properties" and Click on Next.
7. Click "Automatically select the certificate store based on the type of certificate" and click Next.
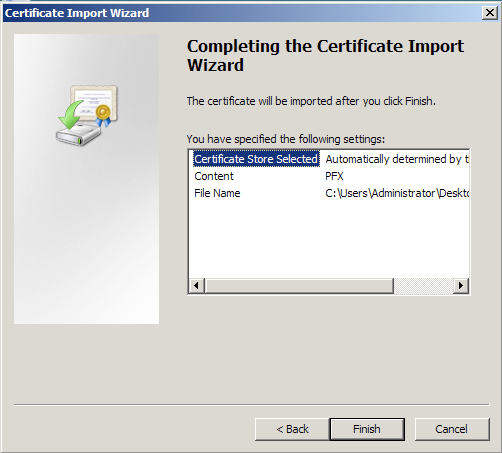
8. Review the Details and Click on Finish to complete the wizard.
Install ADFS 4.0 on New Windows Server 2016 "ADFSFed01" (Temp Server):
1. Click on Server Manager on the Start screen OR from task bar on the desktop.
2. Click on Add roles and features.
3. On the Before you begin page, click Next.
4. On the Select installation type page, click Role-based or Feature-based installation, and then click Next.
5. On the Select destination server page, click Select a server from the server pool, Select ADFSFED01-TEMP.EXPERTS-ADDA.COM, and then click Next.
6. On the Select server roles page, click Active Directory Federation Services, and then click Next.
7. On the Select features page, click Next. (The required prerequisites are preselected for you. You do not have to select any other features.)
8. On the Active Directory Federation Service (ADFS) page, click Next.
9. After you verify the information on the Confirm installation selections page, Don’t Check “Restart the destination Server automatically if required “and click Install.
10. On the Installation progress page, click on
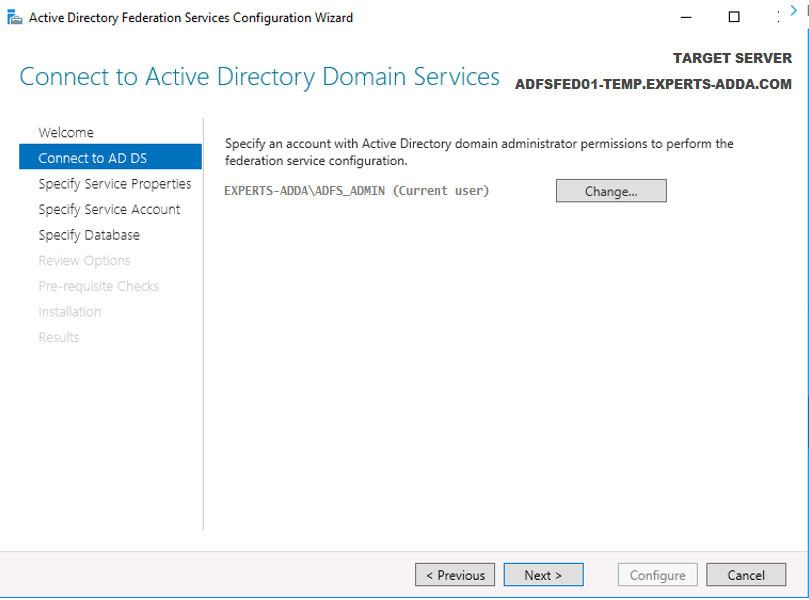
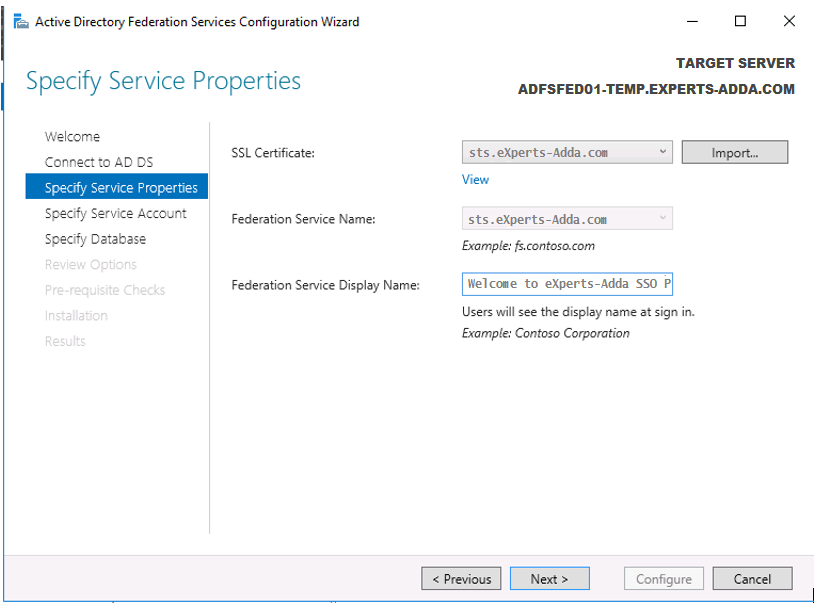
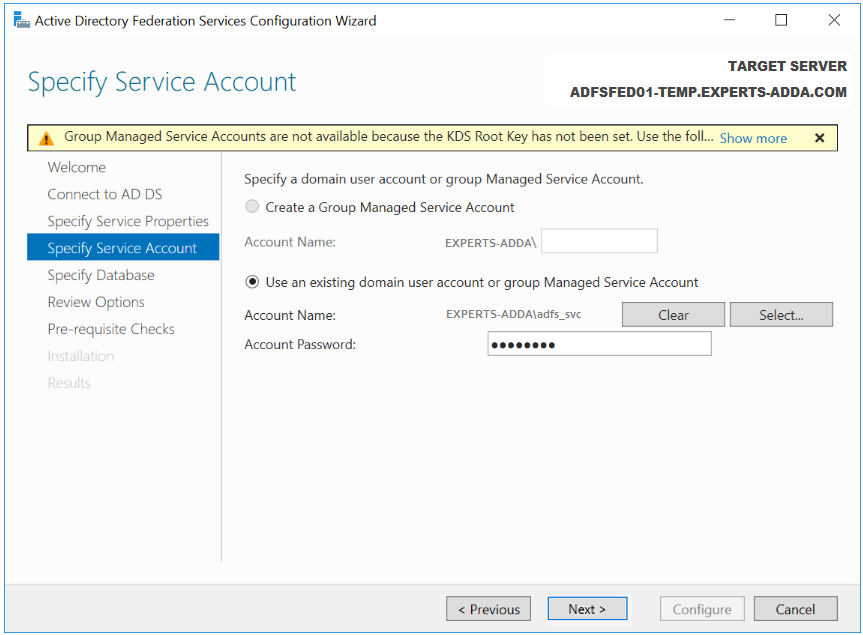
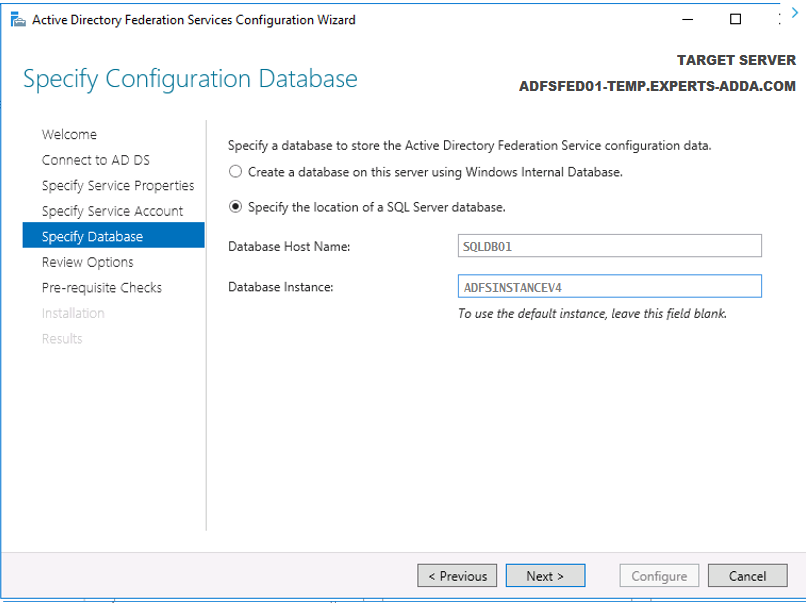
Configure ADFS 4.0 on New Windows Server 2016 "ADFSFed01-Temp":
1. Once Installation Completed. Click on “Configure the federation service on this server”.
2. Select "Create the first federation server in a federation server farm" and click on Next.
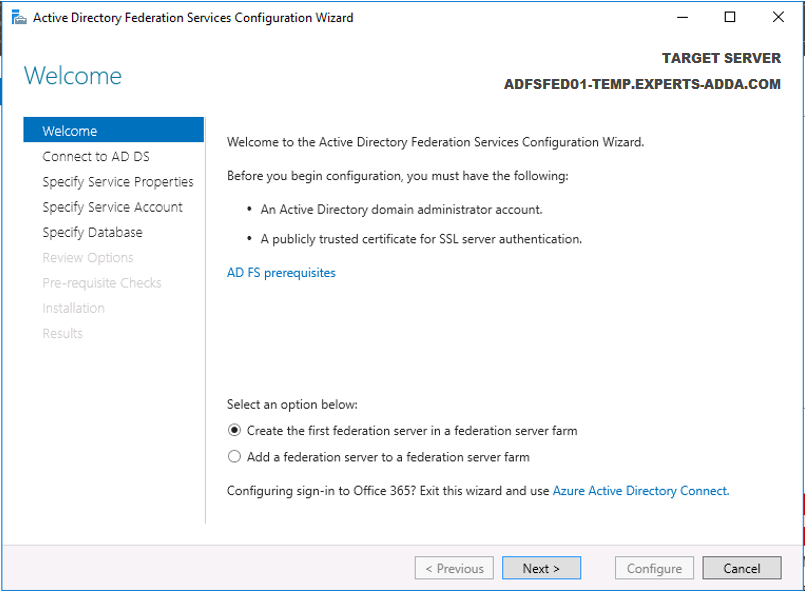
3. Click on Next.
4. Select sts.eXpert-Adda.com from Drop Down as “SSL Certificate".
5. Type "Federation Service Name" noted above.
6. Type "Federation Service Display Name" noted above.
7. Select "use an existing domain user account or group Managed Service Account".
8. Click on "Select..." and select ADFS_SVC Account and click Next.
9. Select "Specify the location of a SQL Server Database".
10. Type SQLDB01 as "Database Host Name".
11. Type ADFSINSTANCEV4 as "Database Instance" and click Next.
12. Review all selections and click on Next.
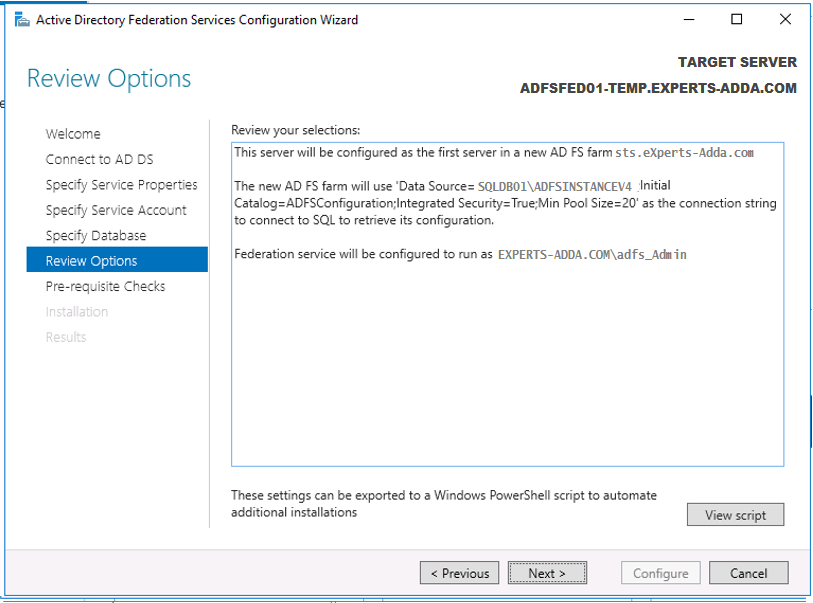
13. Click on Configure.
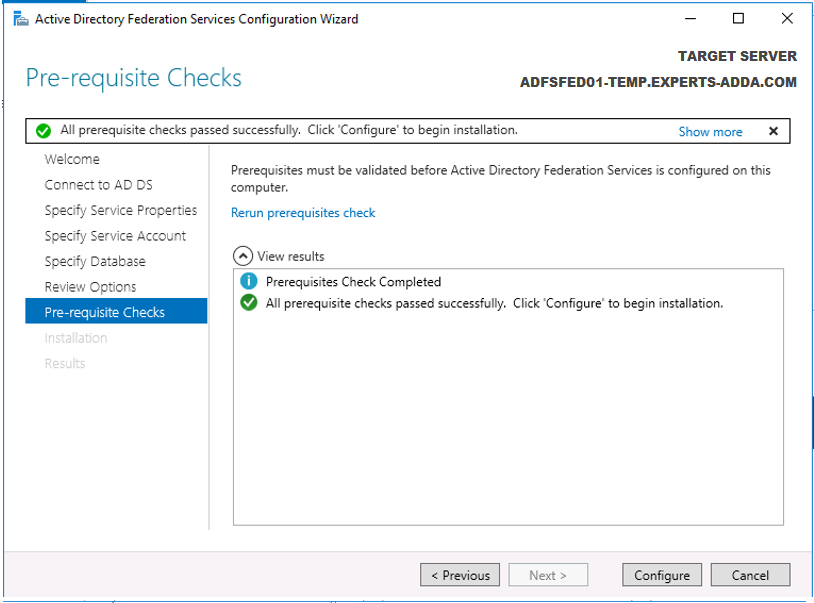
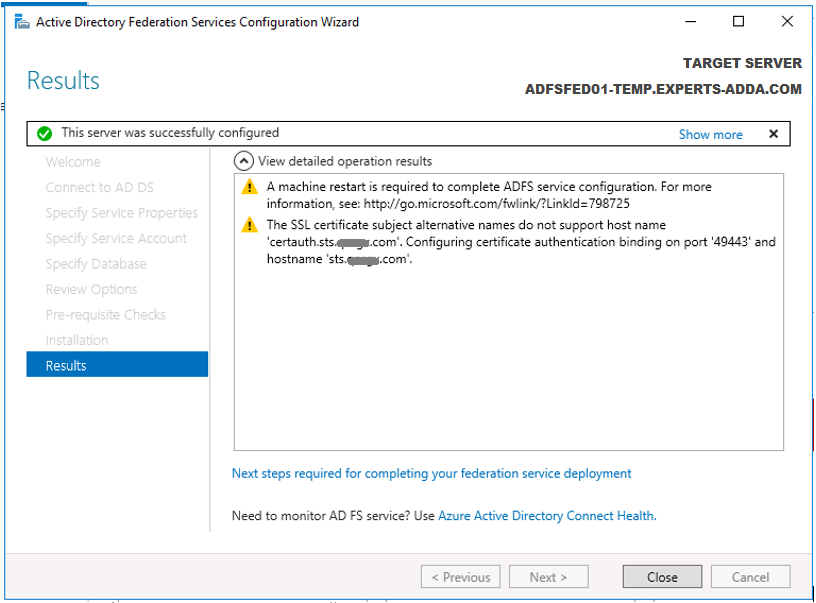
14. Wait for some time until installation and configuration completes and then click Close.
Import ADFS Configuration Files:
1. Mount the Windows Sever 2016 install media and open a PowerShell with “Run as Administrator” privilege.
2. Navigate to the \support\adfs\
3. Run below commmand to import a backup of your ADFS 2.0 configuration.
.\import-federationconfiguration.ps1 -path c:\adfs_backup

4. Dismount the Windows 2016 install media.
Verification of ADFS 4.0 functionality:
1. Login into any client Machine (Desktop/Laptop) with local admin credential within the Corporate Network (LAN).
2. Open HOSTS file from C:\Windows\System32\drivers\etc.
3. Add new Host entry for sts.eXperts-Adda.com as “10.10.10.21 ADFSFed01-Temp”. (Without Double Quote).
4. Save and Close Hosts file.
5. Open Internet Explorer and browse https://eXperts-Adda.com/adfs/ls/IdpInitiatedSignon.aspx.
6. Now you should get the New ADFS 4.0 Login page.
8. Select “Sign in to this site” and click on Sign in and then check if you able to login.
9. Once verified, Open HOSTS file from C:\Windows\System32\drivers\etc and remove host entry which you have created in above (Step 3).
Import the Service Communication Certificate on Proxy Server:
1. Login on ADFSProxy01-Temp.
2. Follow the steps given at "Import the service communication certificate" section and Import Service Communication certificate exported from ADFSFed01. .
Install and configure Web Application Proxy on "ADFSProxy01-Temp":
1. Login on ADFSProxy01-Temp and Click on Server Manager on the Start screen OR from task bar on the desktop.
2. Start Add Roles and Features.
3. On the Select installation type page, click Role-based or Feature-based installation, and then click Next
4. On the Server Selection page, Click Next.
5. On the Server Roles page, Select Remote Access, and click Next.
6. On the Features page, Click Next.
7. On the Remote Access page, Read about Remote Access and Click Next.
8. On the Role Service page,Select Web Application Proxy
9. Click on Add Features, Keep "Include Management Tools (if Applicable)" selected and Click Next
10. On the Confirmation page,Click Install.
11. Wait until installation successfully completed.
12. Click on the "Open the Web Application Proxy Wizard" link.
13. On the Welcome page, Click Next.
14. On the Federation Server page, Enter Below information:
- Type Federation service name: sts.eXperts-Adda.com
- Type User name: EXPERTS-ADDA.COM\adfs_Admin
- Type Password: (Enter ADFS account credentials, as used during the ADFS configuration.)
15. Click Next
16. On the ADFS Proxy Certificate page, select sts.eXperts-Adda.com certificate and Click Next
17. On the Confirmation page, review the information and Click Configure.
18. On the Results page, Once you get "Web Applicaiton Proxy was configured Successfully" message, click on Close.
19. After closing the Web Application Proxy Configuration Wizard, the Remote Access Management Console will automatically open.
20. Before you proceed for further you have to publish application first, to do so.
21. Click on Publish from the right menu.
22. On the Welcome page,click Next.
23. On the Preauthentication page,Select the Pass-through and click Next.
24. On the Publishing Settings page, enter below information:
- Name: ADFS
- External URL: https://sts.eXperts-Adda.com
- External Certificate: sts.eXperts-Adda.com
- Backend Server URL: https://sts.eXperts-Adda.com
25. Click Next
26. On the Confirmation page, review the information and Click Publish.
27. Wait for the ADFS Application to be published.
28. On the Results page, Once you get "Web Applicaiton ADFS published Successfully" message, click on Close.
29. Now the ADFS service is successfully published in the WAP.
Rename ADFS 4.0 Servers with old ADFS 2.0 Servers IP:
1. Note down the IP configuration of ADFSProxy01.
2. Note down the IP configuration of ADFSFed01.
4. Shutdown and isolate ADFSProxy01 and ADFSFed01.
5. Rename ADFSProxy01-Temp as ADFSProxy01 and configure IP noted in step 1.
6. Rename ADFSFed01-Temp as ADFSFed01-Temp and configure IP noted in step 2.
|
Server |
Host Name |
Rename To… |
|
New ADFS Proxy Server |
ADFSProxy01-Temp |
ADFSProxy01 |
|
New Federation Server |
ADFSFed01-Temp |
ADFSFed01 |
In case of any error you get, see below solutions or you can ask a question.
- Microsoft.IdentityServer.Web.IdPInitiatedSignonPageDisabledException: MSIS7012: An error occurred while processing the request. Contact your administrator for details.
http://www.experts-adda.com/questions.php?id=102
- The Federation Service could not fulfill the token-issuance request. More than one claim based on SamlNameIdentifierClaimResource was produced after the issuance transform rules were applies for relying party
http://www.experts-adda.com/questions.php?id=107
Drop your feedback
Note : You are required to be logged-in as a user to leave a feedback.