Step By Step - How To Install Active Directory 2016
 Ganga Sagar
Step by Step - How to install Active Directory 2016
Whats New in Active Directory 2016.
- Privileged access management (PAM)
- Group Membership Expiration
- Azure AD Join
- Microsoft Passport
- Time Synchronization
- Deprecation of File Replication Service (FRS)
- Deprecation of Windows Server 2003 functional levels
Prerequisites of Active Directory Installation.
Hardware
- Minimum 1.4 GHz 64-bit processor
- RAM Minimum 512 MB (2 GB for Server with Desktop Experience installation option)
- Hard Disk Minimum: 32 GB
- An Ethernet adapter capable of at least gigabit throughput
- DVD drive (if you intend to install the operating system from DVD media)
- Graphics device and monitor capable of Super VGA (1024 x 768) or higher-resolution
- Keyboard and mouse
Other
- Windows Server 2016 Operating system
- Administrator Account
- Active network connection
- Static IP
- NTFS partition
- 250 MB HDD space For ONLY Active Directory installation
- Fully Qualified Domain name
Once above prerequisites completed…. Let’s Start for Active Directory Step by Step installation.
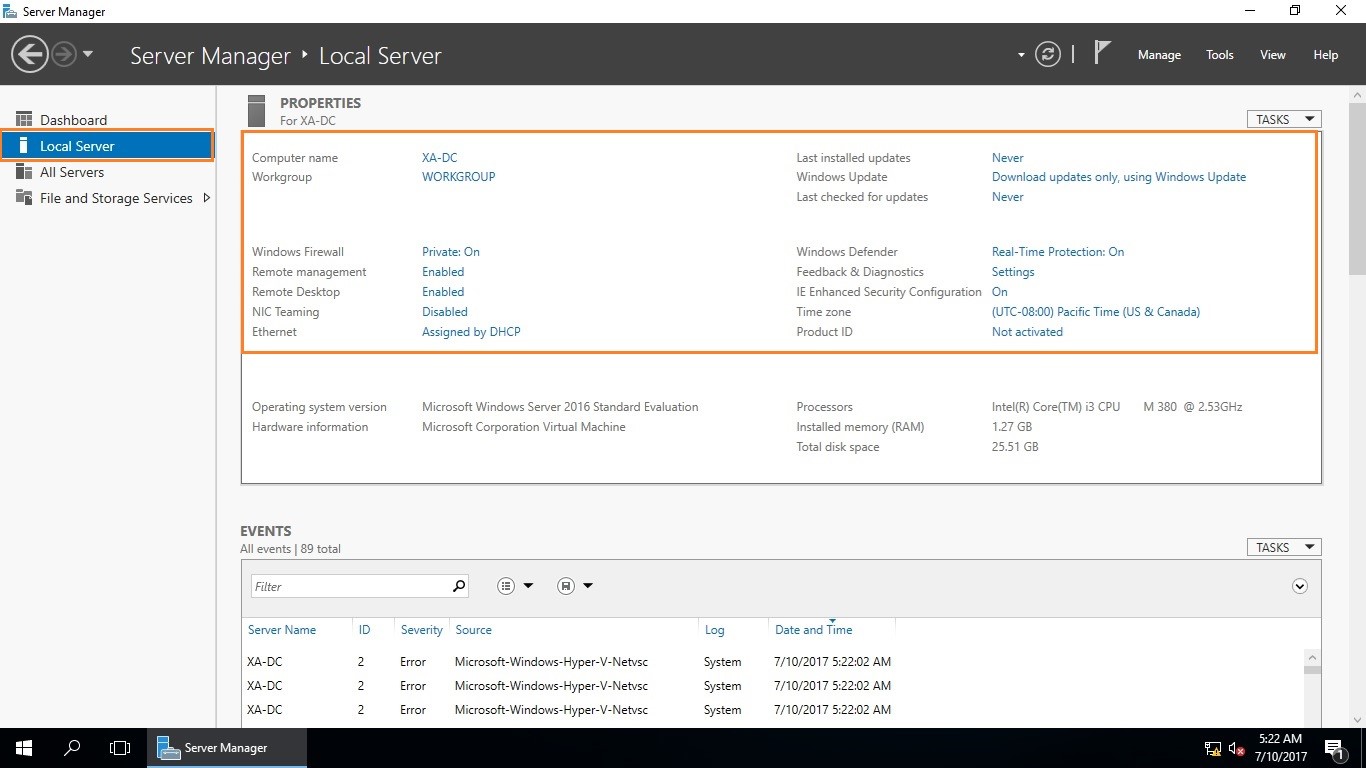
To access Server Manager Dashboard
Click on Start button and then click on Server Manager icon or you can access it by running command ServerManagerCmd.exe and press enter.
Before installing Active directory service, we have to ensure that some settings are configure properly. We can see below some settings which have to be configured. Like: Computer name, firewall, remote management, NIC, IP, windows Update, IE security, Time zone etc. Once all done we can move for next step, Means ADDS Role installation.
To install Active Directory Domain Service (ADDS).
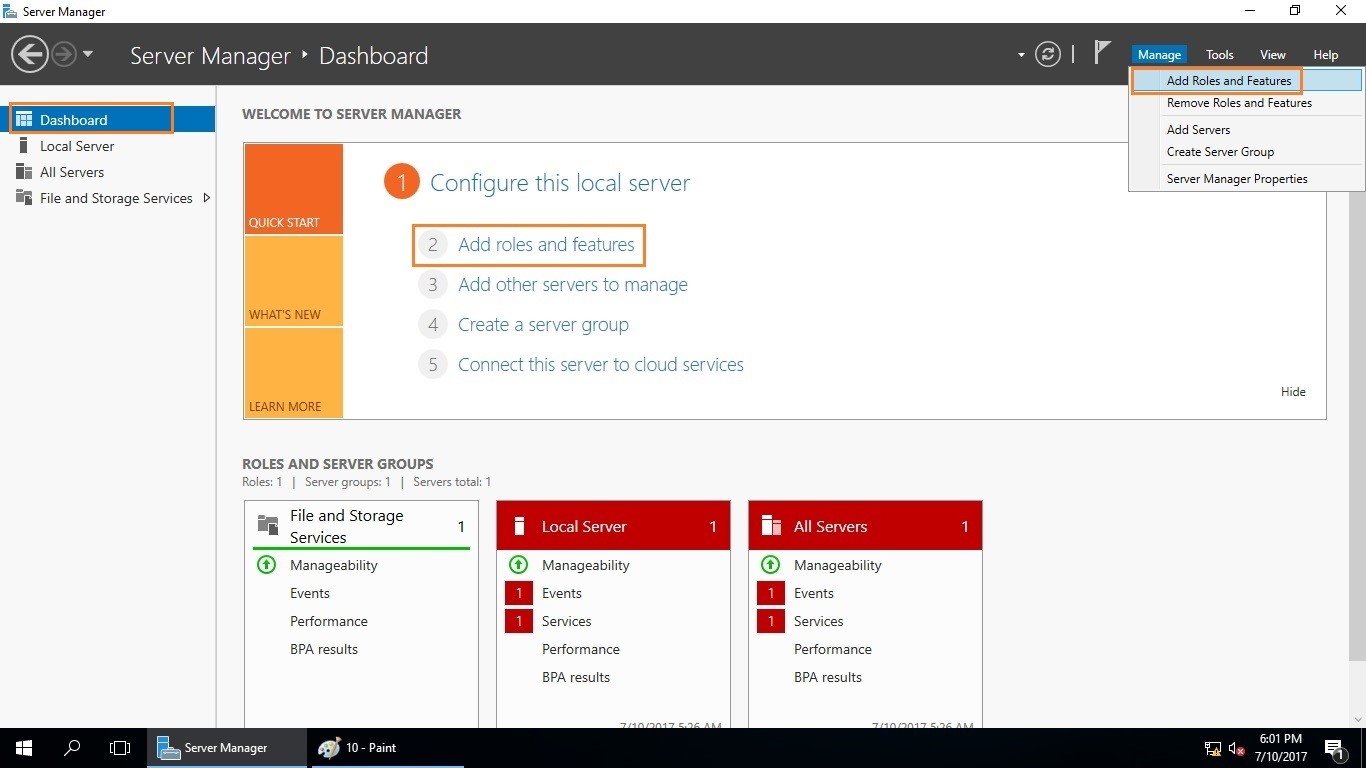
1. Click on Dashboard Tab Then Click on “Add roles and services” or we can click Manage Tab near (notification Flag) and then “Add roles and services”.
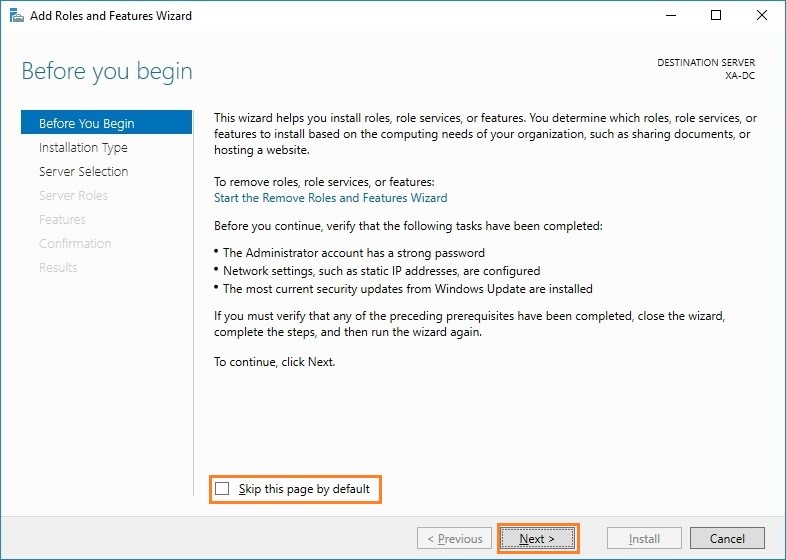
2. In this window we will get some information related to the “Add Roles and Features Wizard”. Like what task should be verified before proceeding. Here we have nothing to do so we can skip this page by clicking on “Next”.
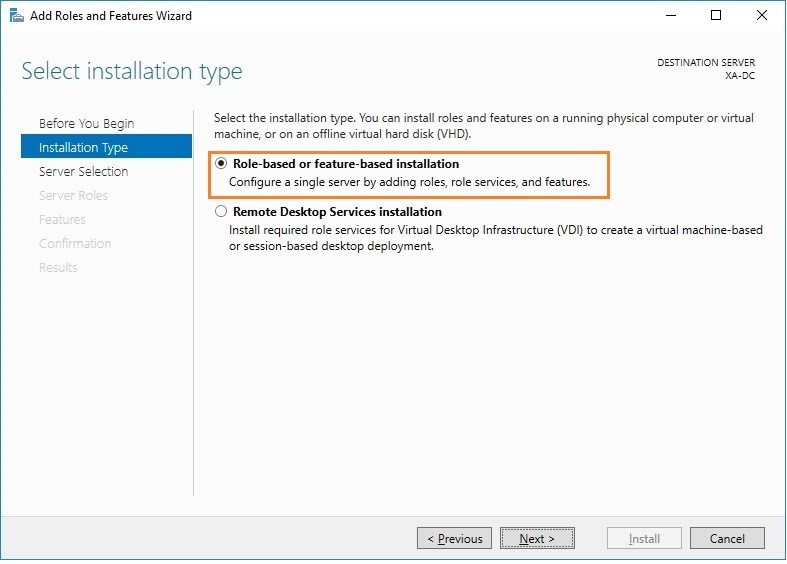
3. In this window we have to select type of installation. as we are going to setup new server (first physical server) so we will select “Role-based or feature-based installation” then click on “Next”.
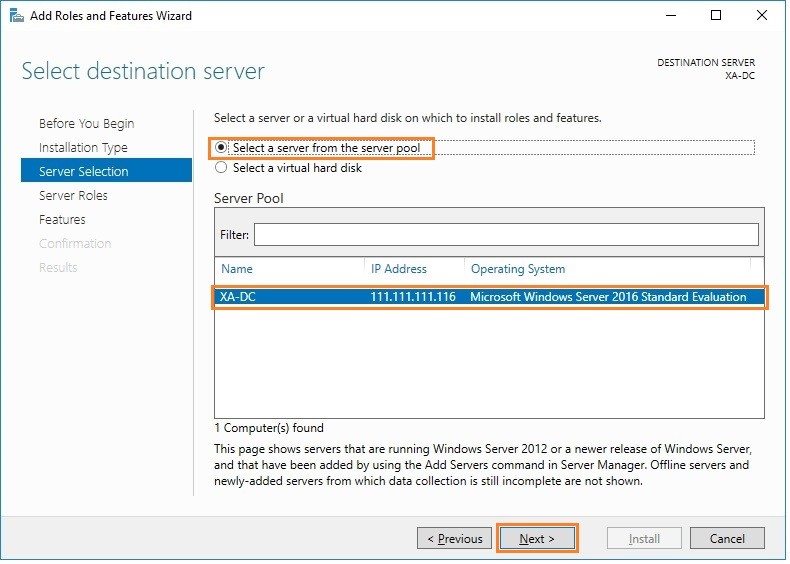
4. In this window we have to select our server from server pool. As this is our first server so only one server is showing in the server pool list which is “XA-DC”. here XA-DC is our server name. so select that machine and click “Next”.
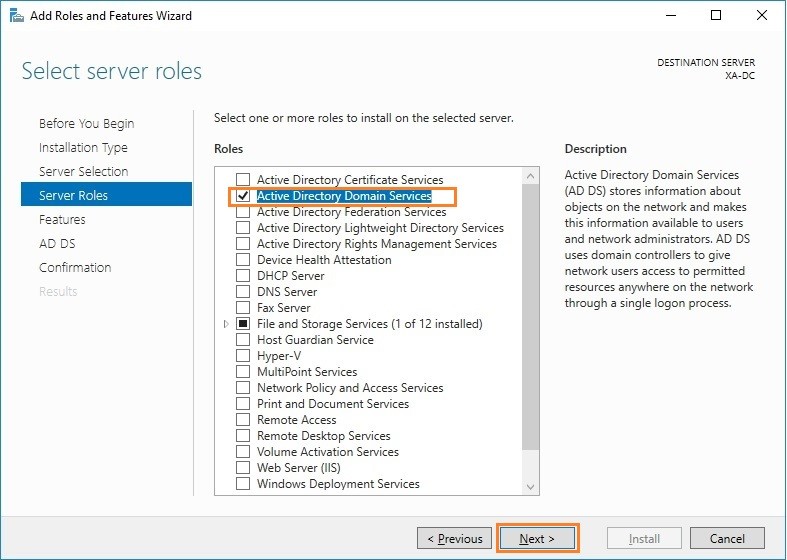
5. In this window we have to select which role we want to install .AS we are going to promote this machine as “Domain controller” so we have to check “Active Directory Domain Service” and click on “Next”.
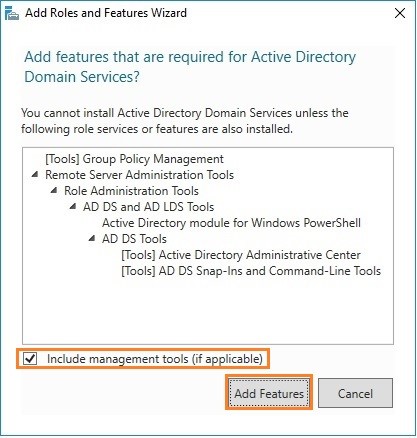
6. As ADDS need some additional features and services to work properly, so a child window will be open to inform us what are the services and features which are going to be installed. Like ADDS and ADLDS tools, PowerShell Modules etc.
For proper management of AD some managements tools may be required, so we have to check the “Include Management Tools (If applicable)” and click on “Next”.
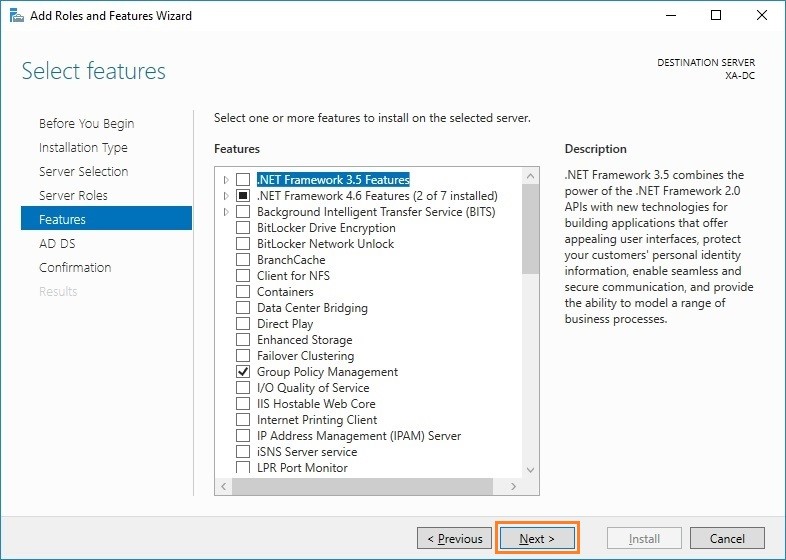
7. In this window we have to select which features we need to install. Required features has been already selected previously, so we will skip this window by clicking “Next”.
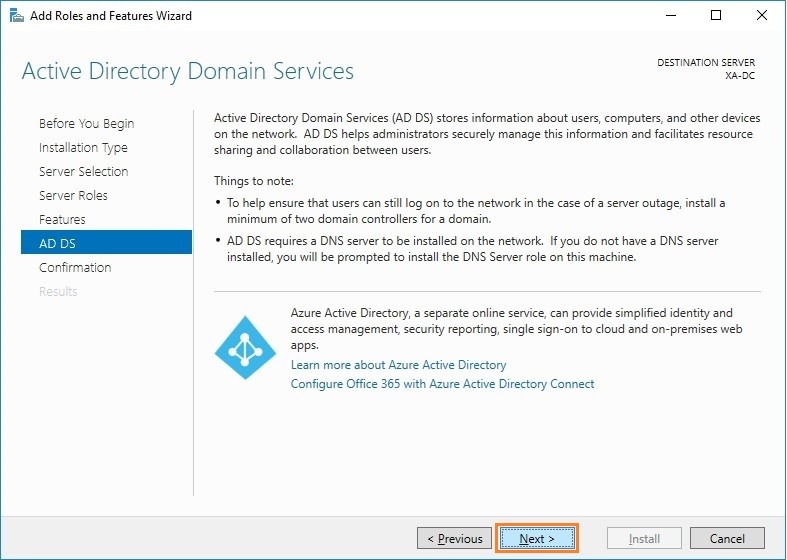
8. In this window, we will get some information about the ADDS and tips to maintain Domain properly. Here we have nothing to do so we will click “Next” here.
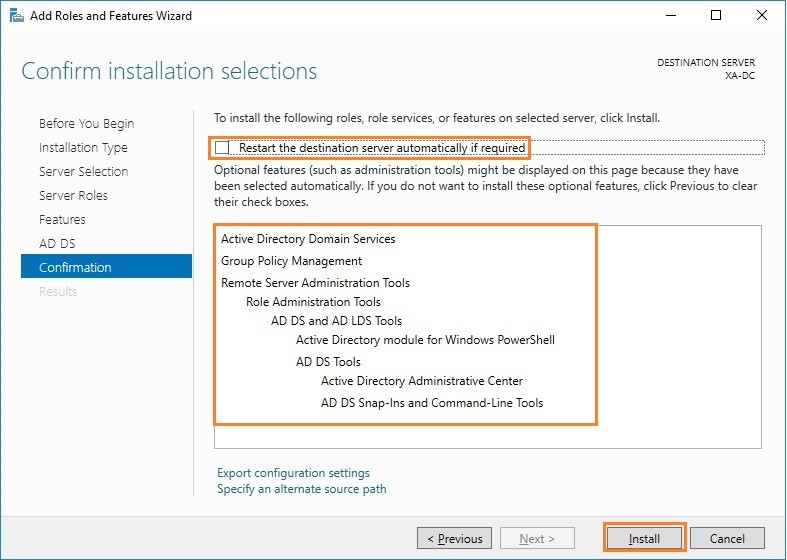
9. In this window, we will get a short detail about the roles and feature which is going to be installed. Here is a check box to Restart the system so these roles, features and services will have installed properly. So we will check the box “Restart the destination server automatically if required”.
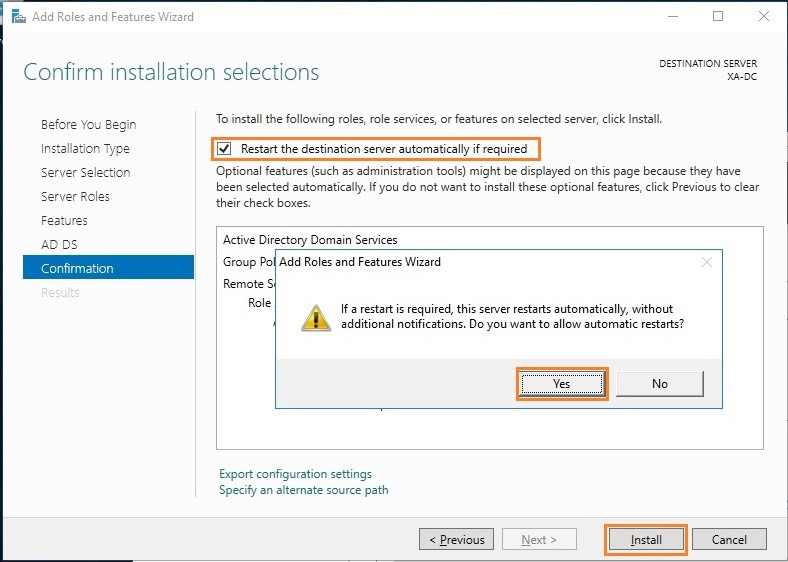
10. When we will check that Check box then a child window will be open to ensure the “Automatic System restart”. As it is already mentioned “If required” so we will click on “Yes”.
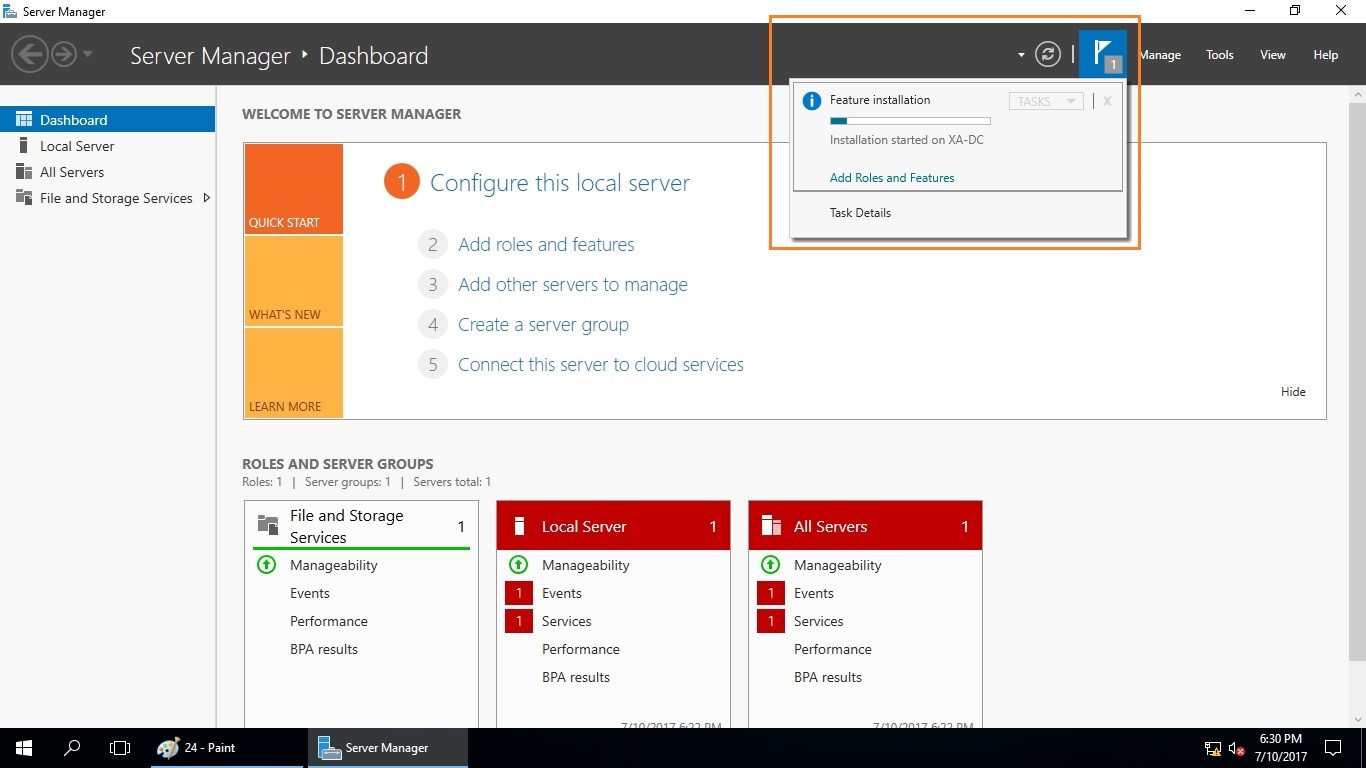
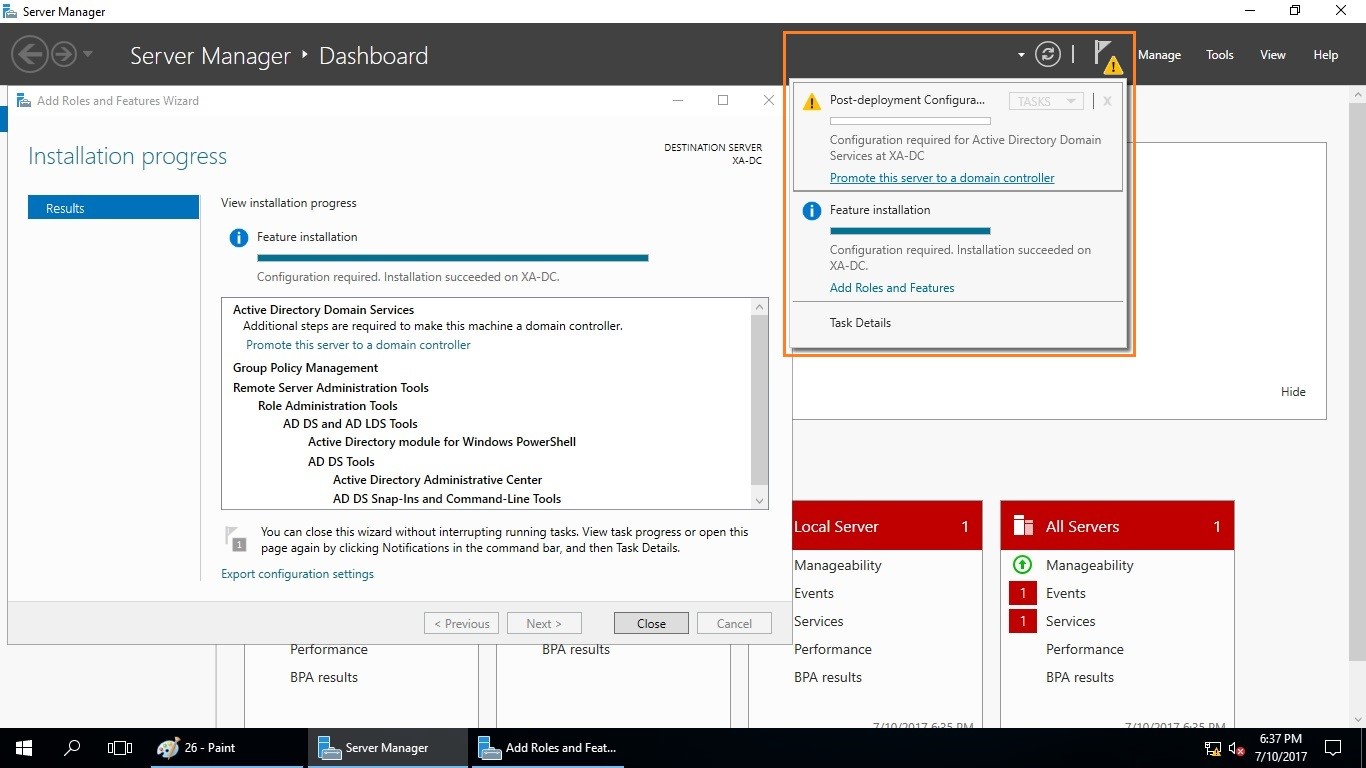
11. While installation is going on we can close that window. That remaining process will be continuing in background. We can access that process window from Dashboard by clicking on “Notification flag”.
12. After successful installation, we will get a link to “Promote this server to a domain controller” additionally we can export all the settings and configuration of this process by clicking on “Export Configuration Settings”. We can close this window now.
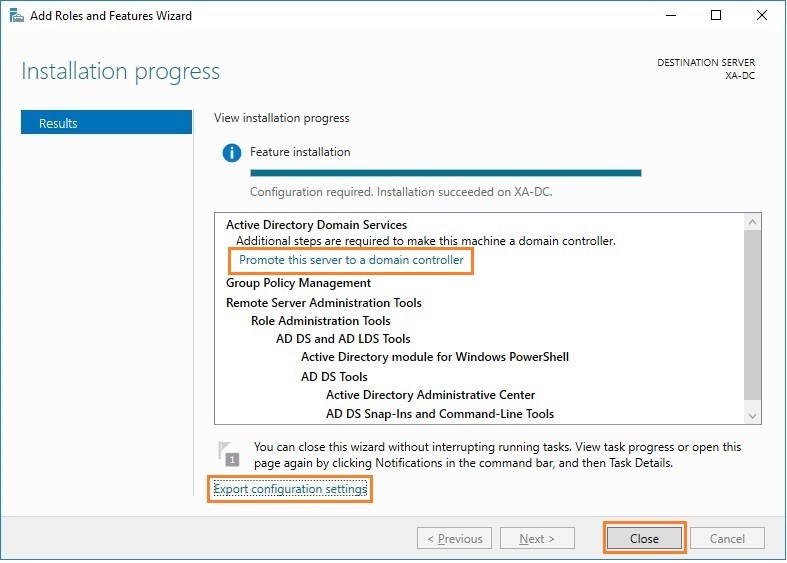
13. To promote this machine as domain controller we can use that link or we can access it via Dashboard Notification Flag.
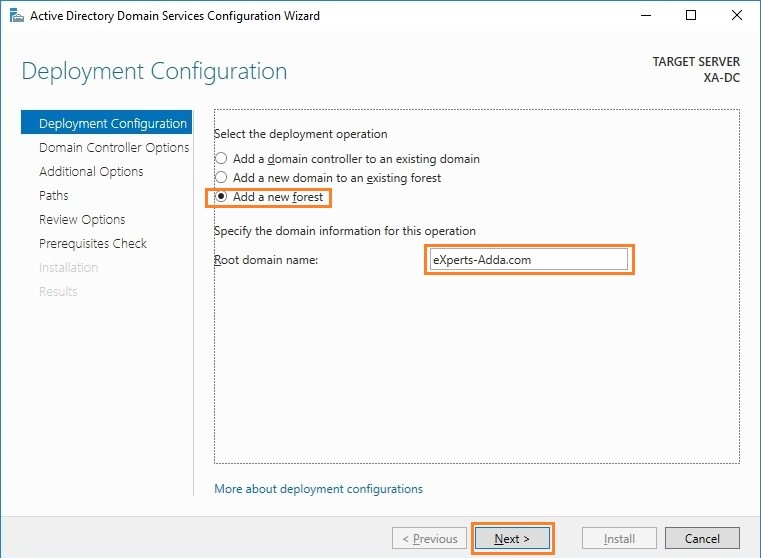
14. Now the main DC configuration process will be start. As this is our new domain so we will select “Add a new Forest” and entered the name of new domain whatever we want. In our case I am going to create a forest (Domain) named “eXperts-Adda.com” and click “Next”.
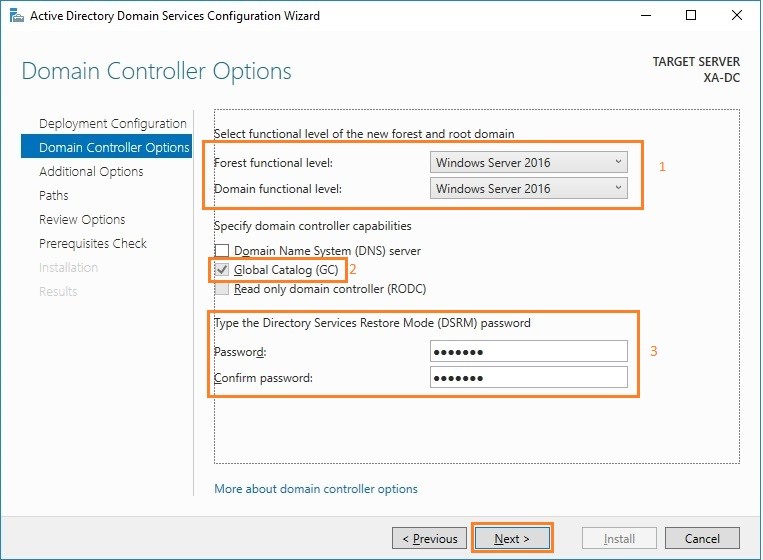
15. Here we have to set “Forest functional level” and “Domain functional level”. Let us know 1st what are these.
Functional levels determine the available Active Directory Domain Services (AD DS) domain or forest capabilities. They also determine which Windows Server operating systems you can run on domain controllers in the domain or forest. However, functional levels do not affect which operating systems you can run on workstations and member servers that are joined to the domain or forest.
When we deploy AD DS, set the domain and forest functional levels to the highest value that our environment can support. This way, we can use as many AD DS features as possible. we cannot set the domain functional level to a value that is lower than the forest functional level. To know more about Forest and Domain Functional Level Check below link.
One more thing as per we can increase the Forest and domain function level but can’t decrease it. So choose functional level as per environment requirement. Here we are going to set Both level to “Windows Server 2016”. So we can use more features.
AS we know that this our 1st DC so this will be our Global Catalog (GC) server too.
The global catalog is the set of all objects in an Active Directory Domain Services (AD DS) forest. A global catalog server is a domain controller that stores a full copy of all objects in the directory for its host domain and a partial, read-only copy of all objects for all other domains in the forest. Global catalog servers respond to global catalog queries.
So finally we are going to set Forest and Domain Functional level to “Windows Server 2016” and set DSRM password too. Directory Services Restore Mode (DSRM) is a special boot mode for repairing or recovering Active Directory. It is used to log on to the computer when Active Directory has failed or needs to be restored.
And then click on “Next”.
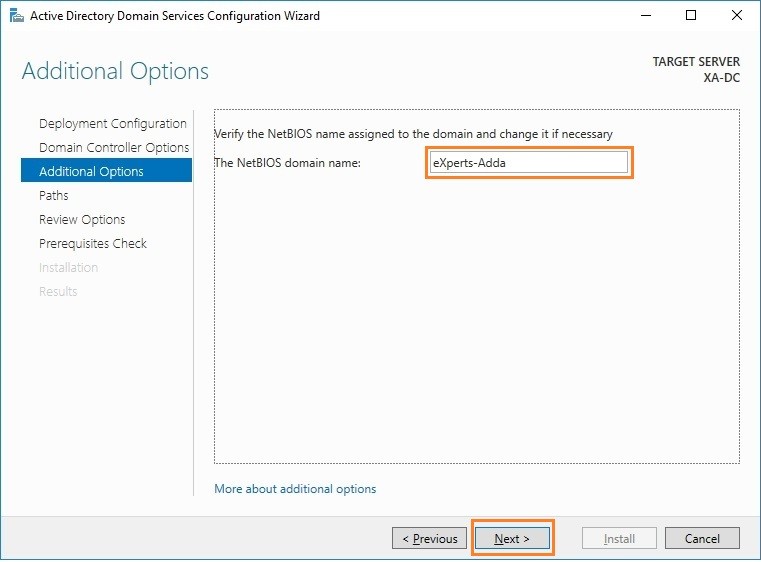
16. Here we have to set NetBIOS name which is similar to Hostname but this is work on different protocol. Here we are going to set it “eXperts-Adda” and click “Next”.
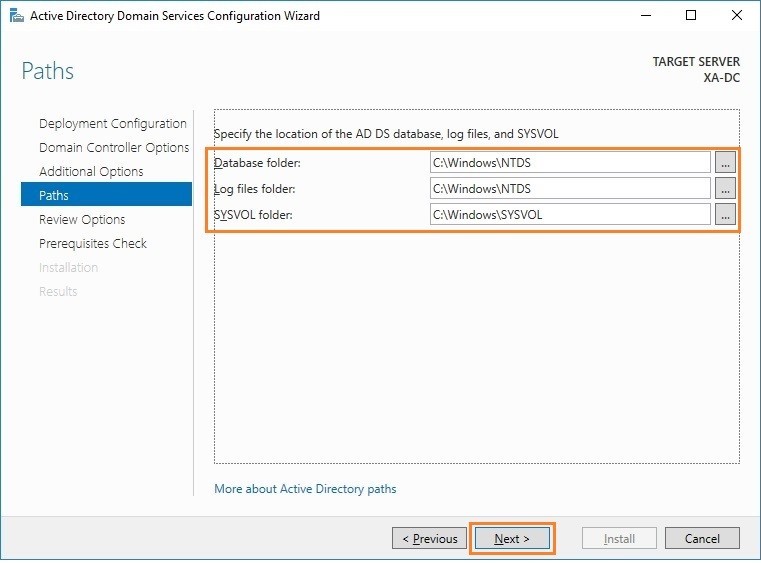
17. In this window we have to specify the location of AD DS database, AD log files and SYSVOL folder. These locations must be on NTFS partition and secure location too. For now, I am going to use its default location which is “c:\Windows\NTDS” for Database & log files and “c:\Windows\SYSVOL” for SYSVOL. Click on “Next”.
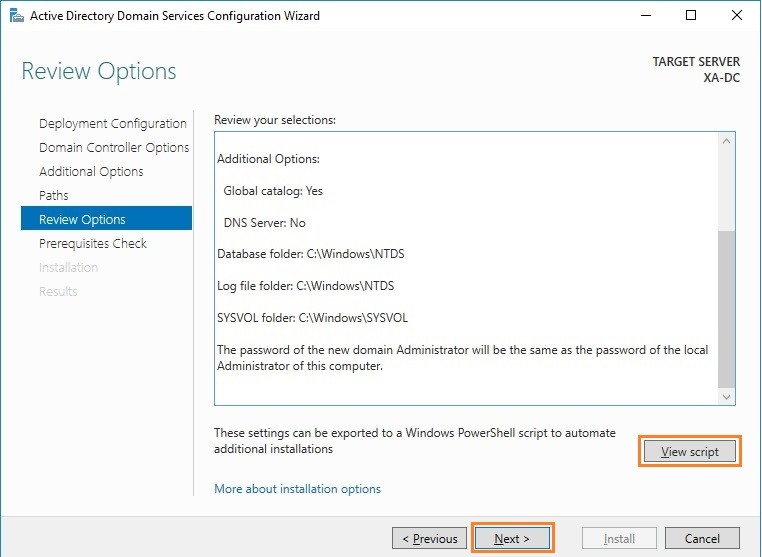
18. Before DC promotion we can review all the selection whatever we have made. Additionally, we can view the script by using we can promote DC using CMD or PowerShell. Then click on “Next”.
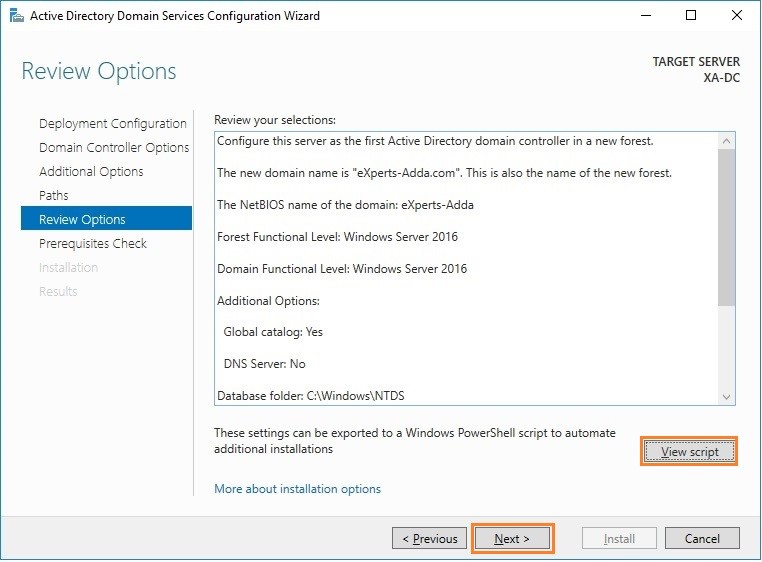
18. Continued...
19. After clicking on “Next” installation process will start verification of Prerequisites for Domain Controller operation.

20. Here we can see that verification is complete. Now we can click on “Install” to start installation.
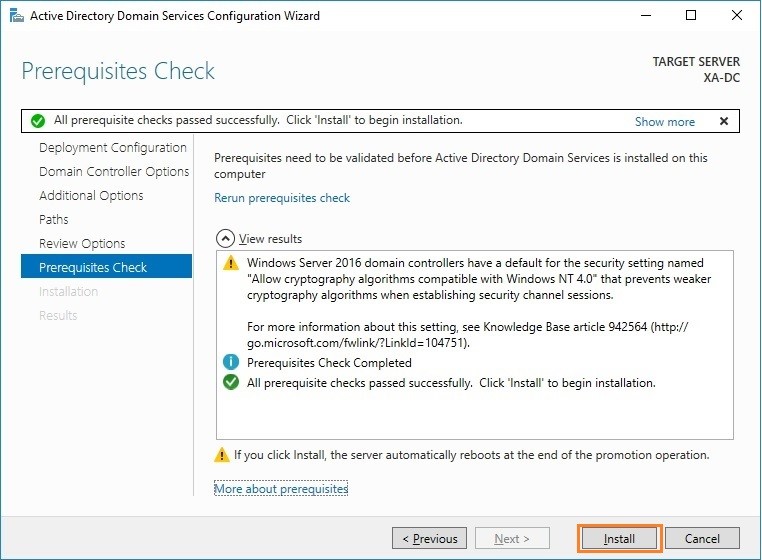
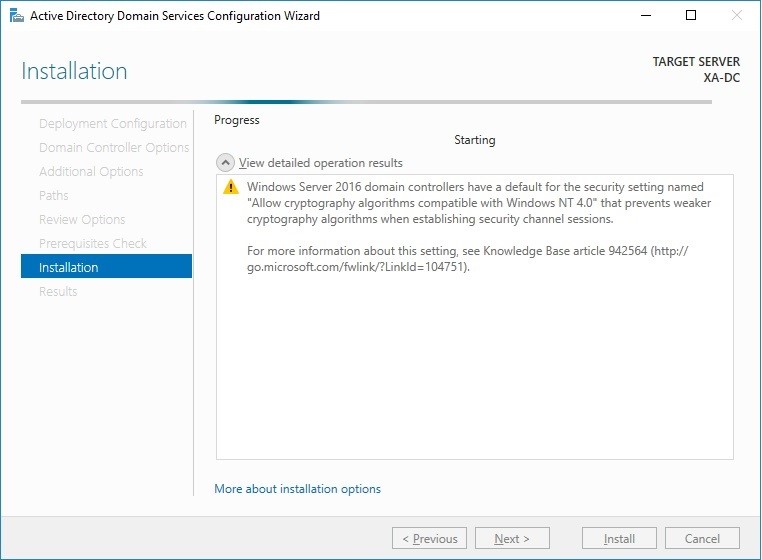
21. Installation process will take some time around 10 -15 minutes depends upon system speed.
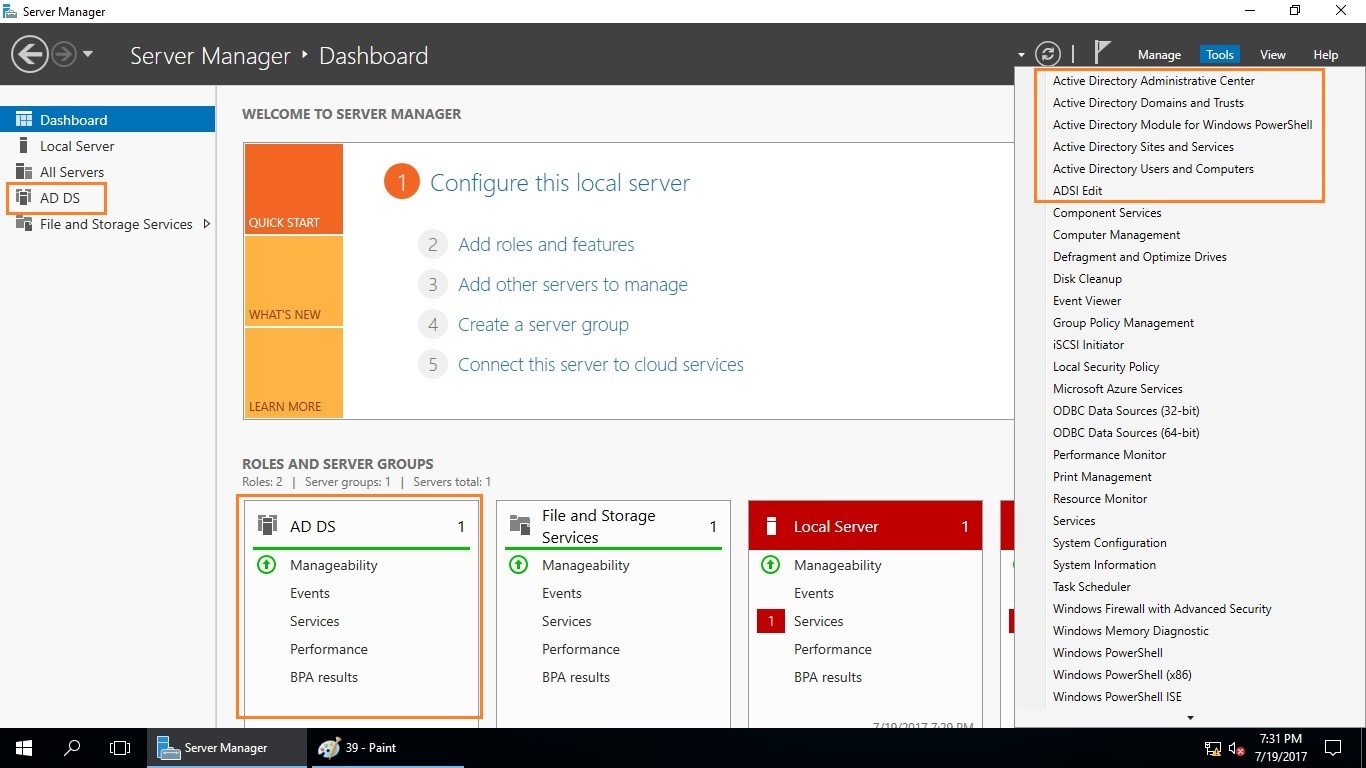
22. Once installation will be complete we can see under Server Manager Dashboard, there is some new options and tabs available related to Active Directory.
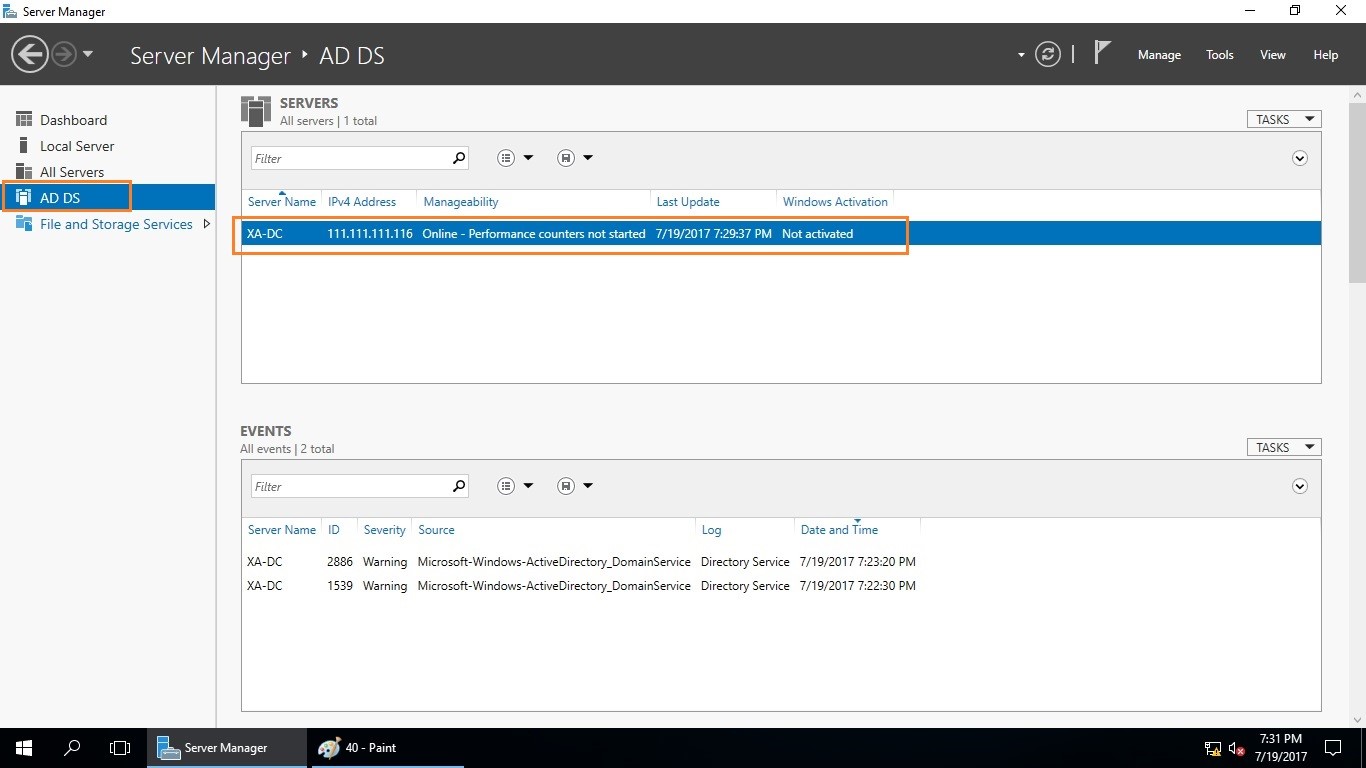
23. Once we will click on ADDS Tab then we will see the server details on which server this Role is installed.
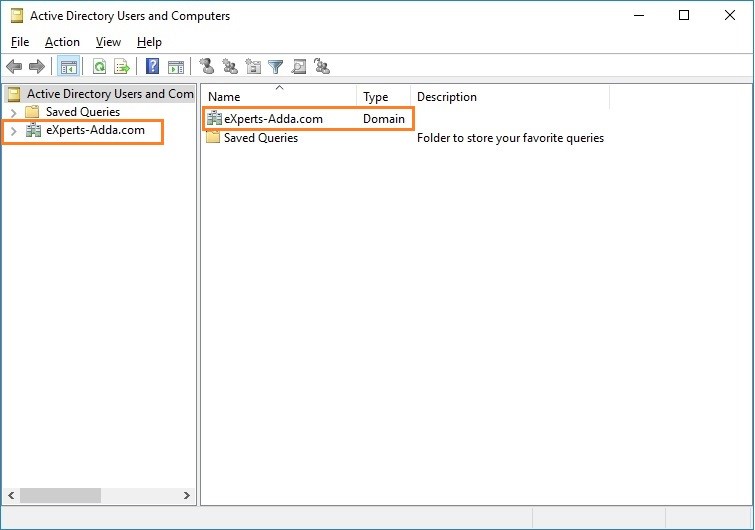
24. When we will open “Active Directory Users and Computer” via running command “DSA.MSC” or via browsing it from start menu, we can see that a new domain named “eXperts-Adda.com” is created now.
How to verify that Active Directory Domain Service is successfully installed.
- Run dcdiag from command prompt, if it shows all test pass then Active directory is properly installed.
- check Active Directory Users And Computers
- By checking SRV Records in DNS Server. After Active Directory is installed, DC will register SRV records in DNS.
- Verify SYSVOL and Net Logon Folder Share by using net share command.
- Verify Database and Log files NTDS.DIT, edb. *, Res*.log.
- Verify Active Directory objects like computers, users and ForeignSecurityPrincipals are created in ADUC.
- Verify whether Default Domain Controllers OU is created and holds the all Domain Controllers.
Drop your feedback
Note : You are required to be logged-in as a user to leave a feedback.